Framing a Shed Wall with DeWalt Nailers: A Step-by-Step Guide
DEWALT GENERAL
10/26/20255 min read

Introduction to Shed Framing
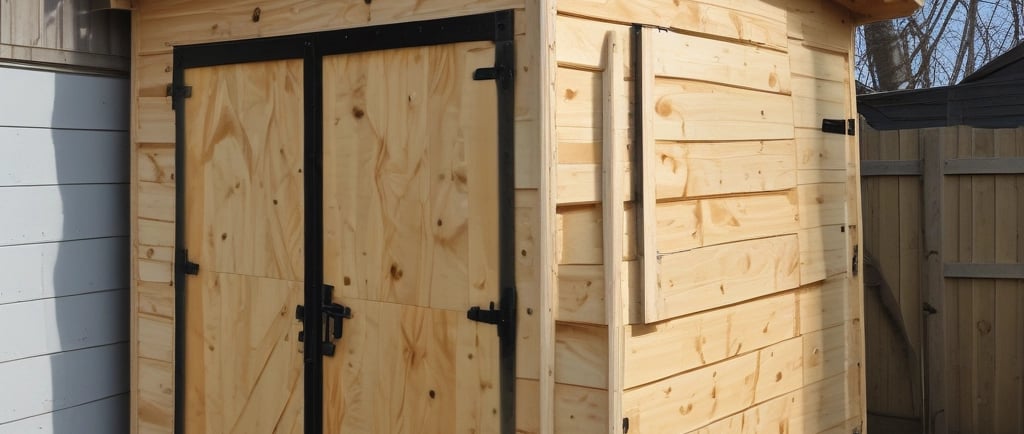
Shed framing is a fundamental aspect of building construction, laying the groundwork for a sturdy, functional structure. The walls of a shed serve not only as physical barriers against the elements but also contribute significantly to the overall aesthetic and functionality of the building. A well-framed shed wall ensures stability, durability, and the capability to support the roofing and other architectural components. As such, it is essential for builders and DIY enthusiasts to understand the intricacies of proper shed framing methods.
When considering framing materials, builders typically choose between various options, such as wood, metal, or composite materials. Each type comes with its benefits and considerations. Wooden framing, often favored for its versatility and ease of use, tends to provide a classic aesthetic that aligns with many shed designs. On the other hand, metal framing offers enhanced durability and resistance to weather-related wear, making it ideal for extreme conditions. Understanding the properties of each material is crucial for selecting the right components tailored to the specific needs of the shed.
In today's construction landscape, the adoption of power tools has revolutionized traditional framing methods. DeWalt nailers, for example, significantly improve efficiency and precision during the assembly process. These tools eliminate the need for manual nailing, which not only speeds up the construction time but also promotes a more uniform and reliable framework. By utilizing DeWalt nailers, builders can ensure that each joint is properly secured, minimizing potential structural issues that may arise from improperly secured materials. Therefore, integrating power tools into shed framing projects is not just a matter of convenience; it reflects a commitment to building quality and safety.
18 Gauge Cordless Brad Nailer for Dewalt 20V MAX Battery


Click 'Shop Now!' to find on Amazon now...
Essential Tools and Materials
Framing a shed wall requires careful planning and the right selection of tools and materials to ensure a sturdy and durable result. Among the critical tools needed for this task are DeWalt nailers, recognized for their precision and reliability. DeWalt offers a range of nailers suitable for framing, with the most recommended models including the DeWalt D51855 21-Degree Framing Nailer and the DWM120K Band Saw, which are praised for their ergonomic designs and high-power performance. These nailers feature an adjustable depth control, allowing users to sink nails flush into the material, which is vital for neat finishes.
In addition to nailers, it is essential to have a selection of hand tools, such as a level, tape measure, and square, to ensure accuracy in measurements and alignments. A circular saw or miter saw is also necessary for cutting lumber to size, while a hammer remains a staple tool for manual tasks. For safety, personal protective equipment (PPE) is crucial; this includes goggles, gloves, and hearing protection to safeguard against potential hazards during the framing process.
The materials needed for framing a shed wall consist primarily of high-quality lumber. Commonly used types include pressure-treated pine for studs, as it provides resistance to moisture and decay. The typical framing layout uses 2x4 inch or 2x6 inch lumber, adhering to local building codes. Additionally, a selection of nails specifically designed for framing, such as galvanized or commonly referred to as “ring shank” nails, enhances the structural integrity of the shed wall.
By assembling the appropriate DeWalt nailers, hand tools, PPE, and quality lumber, enthusiasts can ensure they are well-equipped to tackle the shed wall framing project efficiently and safely.
Step-by-Step Framing Process
The process of framing a shed wall using DeWalt nailers requires careful planning and execution to ensure structural integrity and durability. Start by preparing your site. Choose a level area and clear any debris that might obstruct your work. It is advisable to set up the location of your shed with stakes and string, marking the perimeter to maintain an organized workspace. This preparation is crucial as it sets a solid foundation for your construction.
Next, you will need to measure and cut your lumber. Use a measuring tape to determine the dimensions of your shed wall. It is typically framed with 2x4 lumber, which provides sufficient strength while being easy to handle. For vertical studs, standard spacing is 16 inches on center, but adjustments may be necessary based on your specific design. When cutting the lumber, ensure your measurements are precise, and remember to take safety precautions, using goggles and gloves. Employ a circular saw for accurate cuts and a squared edge.
Once all the pieces are cut, it's time to assemble the frame. Lay your bottom plate on the ground and position the cut studs vertically at the marked intervals. Use a carpenter's square to ensure that each stud is perpendicular to the bottom plate. When aligning everything, it’s essential to double-check measurements. Secure the studs temporarily with clamps for stability as you proceed. With your assembled frame ready, use your DeWalt nailer to attach each stud to the bottom and top plates, ensuring your nails are driven straight and flush for a well-aligned frame.
Finally, check the frame for squareness by measuring diagonally from corner to corner. Adjust as necessary, then finish securing your studs with additional nails. This process not only enhances the structural integrity of the wall but also ensures a high-quality finished product. Your shed wall frame is now prepared to withstand the elements, ready for further construction steps.
Final Touches and Safety Considerations
Once the walls of your shed have been framed using DeWalt nailers, it's essential to attend to the final touches, which will enhance structural integrity and prepare the wall for weatherproofing and insulation. Start by adding bracing to ensure the walls remain squared. This is crucial as it prevents any warping and provides stability over time. Diagonal bracing can be applied between the studs, further reinforcing the frame. Ensure all measurements are accurate, adjusting if necessary to maintain squareness in the walls as any deviation can lead to larger issues in the overall construction.
After securing the bracing, you may consider preparing the walls for insulation or siding. If insulation is planned, ensure that the framing allows for the appropriate thickness and type of insulation to achieve desired energy efficiency. Additionally, installation of moisture barriers is essential, particularly in climates where humidity may be a concern. This preparation step not only aids in temperature regulation but also protects against potential water-related damages.
While focusing on these finishing touches, it is equally important to prioritize safety when using DeWalt nailers and other tools. Personal Protective Equipment (PPE) such as safety goggles, gloves, and ear protection should always be worn during framing. Furthermore, be vigilant about creating a clutter-free workspace to minimize trip hazards. Adequate training on the proper use of nail guns is crucial; always point the tool away from yourself and others, and ensure the area is clear before firing. By implementing these safety considerations, workers can minimize the risk of accidents, ensuring a more efficient and secure working environment. This approach not only enhances the project's success but also safeguards everyone involved in the framing process.